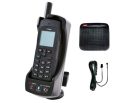


Product Description
- SAILOR CH3508 is a Dual Position Charger(with Rear Pocket Battery only Charger or Stow feature) for ATEX/non ATEX rechargeable batteries
- Compatible with all SAILOR SP3500/3900 series VHF/UHF Radios.
- Front compartment is for recharging the Radio + Battery attached to the radio or charging battery only stand-alone.
- Plus a Rear compartment is for charging or stowing a spare battery(does not fit Radio + Battery attached).
- Part# CH3508 > Dual Charger Stand
- Part# 88-125538-B > AC/DC Switching Adapter/converter, Input: 100-240VAC / Output:12.0VDC, 1.2A, 14.4W / 50/60Hz, 0.65A MAX, Total Available Cable Length: 2.87m(113in) compromising the AC cord: 140cm(55in) and the DC Cord: 147cm(58in)
- Part# 37-124381-B > DC Power Cable: 146cm(57in) with Black/Red wires to connect to DC power supply
- Part# 67-124746 > Screw Kit for Charger/StandConnecting to power
The charger can be supplied from DC or from AC using an AC/DC converter.
DC: Connect the 12-24VDC Connection Cable between the DC supply and the connector on the underside of the charger.
AC: Connect the AC/DC converter to the connector on the underside of the charger. Then connect the AC/DC converter to the AC outlet.
- Front position for: (a) charging the Handset/Battery attached, or just for (b) Charging the Battery all on its own.
- Rear position pocket: (b) Charging or simply to Stow a Spare Battery.
- 100-230VAC operation voltage
- Charger can be either Desk-top or Wall Mounted for your convenience
- Charging time with empty battery:
(a) Radio turned off approx 4 hours, (b) Radio turned on : approx 5 hours - comes with AC/DC converter/adaptor 88-125538
Compatibility: Sailor SP35xx VHF/UHF series radios
BATTERY CHARGER OPERATION/MAINTENANCE –
If the radio is not used for several weeks it is recommended to store the radio and battery separated to reduce self discharge of the battery.
Connecting to power
The charger can be supplied from DC or from AC using an AC/DC converter.
DC: Connect the 12-24VDC Connection Cable between the DC supply and
the connector on the underside of the charger.
AC: Connect the AC/DC converter to the connector on the underside of the
charger. Then connect the AC/DC converter to the AC outlet.
CH3508 – Recharging the battery
Front Position: Insert the radio with battery attached or insert only the battery stand-alone
Rear Position: Insert the battery into the charge position, or insert to the stow position.
Note: If the radio cannot turn on due to complete discharged battery, then turn
off the radio and place it in the charger or charge the battery alone.
The light indicators on the charger cradle show the status as follows:
• Green light: Power is connected to the charger.
• Slow red flash: Charging in progress.
• Quick red flash (twice per second): Charging error, e.g. battery defect or temperature out of range.
• Steady red light: Charging completed. Trickle charge mode.